How to Repair Broken Furniture Embellishments
Nov 10, 2016
AFFORDABLE DO IT YOURSELF HOME PROJECT | FURNITURE MAKEOVER | REPAIR BROKEN FURNITURE
I recently found the perfect dresser on OfferUp…

Perfect, that is, until it was delivered, and I noticed a few imperfections not mentioned in the description…

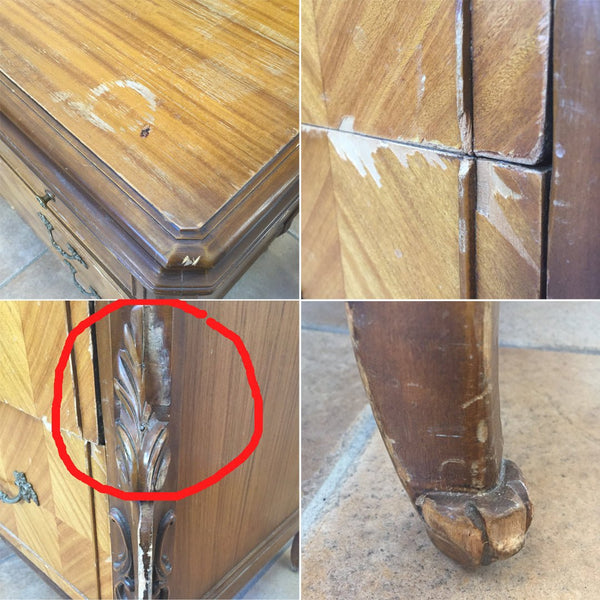
The water marks, dings, and peeling veneer are par for the course with antiques and easy to work with, but the broken embellishments were a real disappointment! They are an important part of the piece, so I didn’t want to simply remove them.

As luck should have it, the part of each embellishment that was missing was intact on the other piece which made my repair plan pretty easy. To make a similar repair, all you need is Durham’s Rock Hard Water Putty and Air Dry Modeling Clay.

I started by pressing the “good” part of each piece into a thick chunk of modeling clay like this:

Then, I mixed the putty powder with water in a small dish like this:

Durham’s is the best kind of putty, because it comes in powder form. You just mix up as much as you need so there is little waste. You can also mix it to the consistency you want.

With the putty mixed into a slightly watery consistency, I poured it into the clay molds I’d made. Since I had half of the broken piece shown below, I put it into the clay mold first, then added the putty to it, like this:

Once the putty dried completely (about two hours since the embellishments are so thick), I gently pulled the clay away from the freshly molded putty, like this:

I attached the above piece to the original with a little extra putty. This is what it looked like before a little sanding:

This is how the other piece looked after I pulled the clay mold off:

So far so good!
Before re-attaching the newly fixed pieces, I made my own chalk/mineral paint by adding BB Frösch Paint Transformer to my new favorite green—a color match to “Divine Horizon.” If you love it, too, just take the bar code in this photo to your local Home Depot and have them mix some up for you!

In hindsight, I should have attached the pieces, then painted the dresser, but I painted the pieces and dresser separately. Note that adding BB Frösch Paint Transformer to my paint gave it incredible coverage, and you can't tell which parts of the dresser are wood underneath the paint, and which are the repaired embellishments.

I painted the dresser in the pale green, but I gave the dresser top a beautiful faux stain finish with BB Frösch. If you know me, you know I NEVER use traditional stain. It’s way too messy and unpredictable. I much prefer the faux stain technique. Find details on this technique here. This is how the top looked after faux staining with BB Frösch Paint Transformer, before waxing it with BB Frösch Dark Premium Finishing Wax:

With the dresser complete, I tried gluing the new pieces on with wood glue. I used painters tape to hold the pieces in place while the glue dried:

Had I not painted and waxed everything before putting the pieces back on, this solution would have worked great! But, the wood glue wasn’t strong enough, so I ended up nailing the pieces in place and using a stronger glue.

The whole project took me a day (thanks to the quick drying properties BB Frösch Paint Transformer gives my paint and BB Frösch Premium Finishing Wax!)

If you look closely, you'll see the OTHER thing about this piece that I failed to notice until I'd had it in my house for two days...as beautiful as it is, one of the drawer pulls is different! Hmmmm...
