Painted Tile Floor w/ Bonus DIY Pattern
Dec 09, 2020
PAINTED TILE | HOW TO PAINT TILE | FIREPLACE MAKEOVER
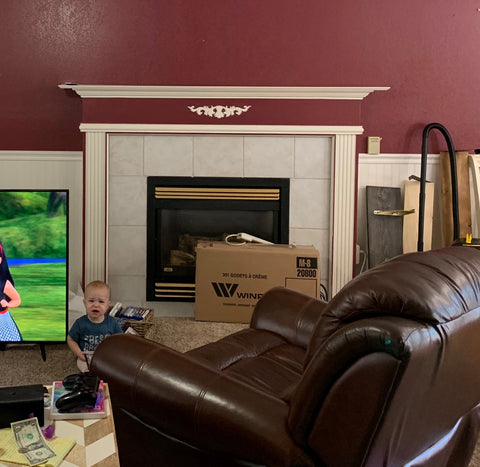
I definitely love this fireplace! We did the shiplap and mantle when we first moved in. The tile, however, got neglected and was in need of some lovin'.
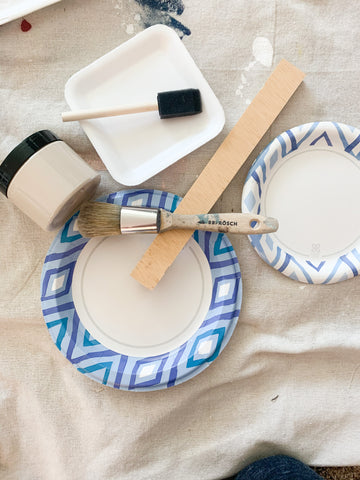
Here's a list of supplies I used:
- BB Frösch Paint Transformer
- Base Color (I used white)
- Pattern Colors (I used 4 different ones)
- Foam Roller
- Paint Tray
- Painters Tape
- Mixing Jars
- Cleaning Supplies
- Pencil
- Random household Items ( I used paper plates and pieces of cut wood)
- Zibra Brush (to apply sealant)
- Floor Sealant
- Sponge Brush
Let's get started...
Always always always clean your project before painting. If I had anymore tile than this (such as in a kitchen) I would steam clean the area. Since this was just four tiles, I was easily able to do it by hand.

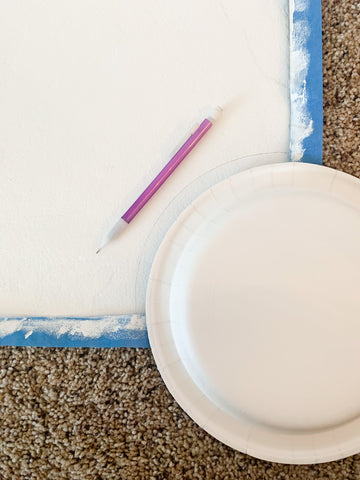
Tape off the areas you do not want to get paint on.

For my base layer I used leftover white paint that we had on hand. That's why it's in the 5 gallon bucket. The color is "Decorator White" by Behr Paint and it is my favorite white.

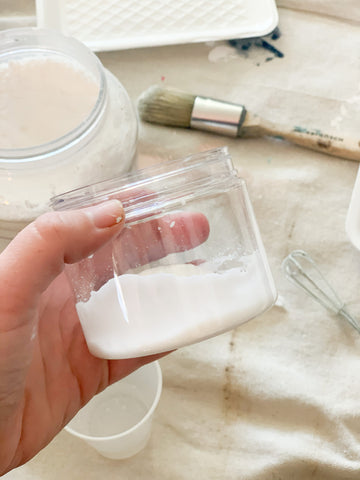
For tile, I added a little more paint transformer than I usually would. This helps with bonding. Adding extra powder won’t hurt your paint in any way—it can only help. I mixed 3 Tablespoons of BB Frösch Paint Transformer with 2 Tablespoons of water. This is for a sample size or 8 oz. of paint.

Mix the powder and water with your mixing whisk. You are after a “doughnut glaze” consistency. If your mixture is too thick or clumpy, just add a little water until you get the desired consistency. Once combined, add your paint, put the lid on your jar, and shake until you cannot see the white powder anymore. It's hard to tell with white paint so really shake it well.
Once the powder, water, and paint are all mixed together you are ready to begin painting.

I poured the mixed paint onto my paint tray because it is easier to roll it on from here.
I like painting floor tile with a roller and paint tray.

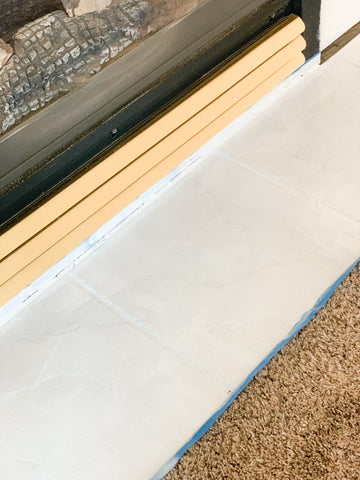
You want your first coat to be thin. This coat sets the tone for bonding and the rest of the project. You can see it still looks a little "blotchy" here. Don't worry, that will smooth out beautifully with subsequent coats.
Let your first coat dry completely before painting the second coat.
Once you are satisfied with your base color you can mix up and get your other colors ready. I always grab the $.50 "oops" colors from Home Depot. These colors look super similar but are all neutral which is perfect for what I was after.

You will still need to mix the layering colors with BB Frösch Paint Transformer as you want them to bond and be chalk paint as well.

This is what the paint, powder and water will look like before mixed.

To create my own pattern I just grabbed a few random items from around the house like paper plates and a pieces of wood.
I started by tracing shapes with my random items. I used a pencil so it could easily be erased or painted over.
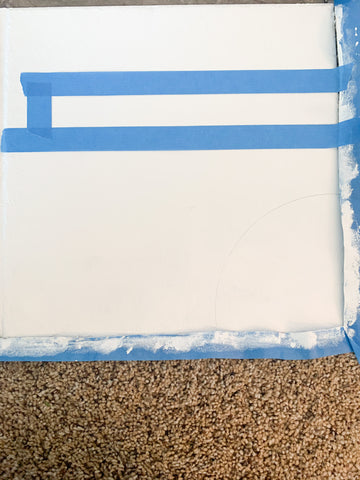
I continued adding shapes and lines until I was satisfied.

For the straight lines I was easily able to tape them off.
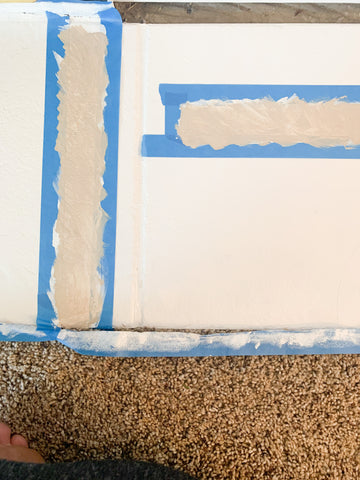
A step that I highly recommend doing is painting along the tape line with your first color. This will help prevent bleed though with the next color.

Next, paint on your second color. You will want to remove the tape when the paint is still wet.
I had to free hand the round shapes which was a little harder but totally worth it.

After taking a step back I felt like it needed a little more.

I mixed up another color and found another shape to add to the mix.


Getting there! This still felt like it needed more...

I added a couple "swooshes" with my 1 inch sponge brush. Finally I had the look I wanted.

After getting the look I wanted I was ready to seal. I had this poly on hand so that's what I went with. When sealing a floor you will want to use some type of floor sealant. This isn't made for floors but is an exterior sealant that I have used before and love the outcome.
I applied this with a small Zibra brush. If I were doing a larger area I would use a roller.

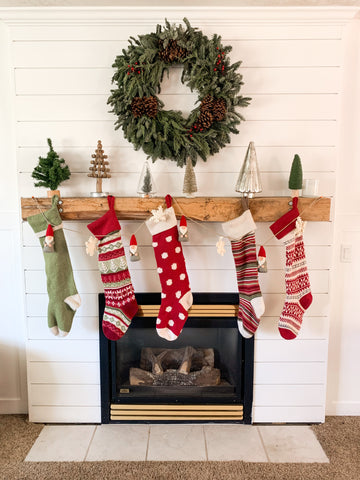
Here is the final result!

Just for fun...here's what the fireplace looked like when we first moved in..