
Stencil the Living Daylights Out of It!
Oct 14, 2020
DIY CHALK/MINERAL-PAINTED DRESSER | AFFORDABLE DRESSER MAKEOVER | HOW TO STENCIL FURNITURE WITH CHALK/MINERAL PAINT

This post is super special because we have a guest blogger, Caroline from Living on Salt Water. She does some amazing stencil work & we are so excited to have her on here to share her tips & tricks!

I was inspired recently by another furniture artist’s creation of a faux bone inlay dresser. It was a gorgeous navy and white dresser and I knew I wanted to create a similar look on my dresser. I found an antique oak dresser with inset drawers and then gathered all of my supplies.
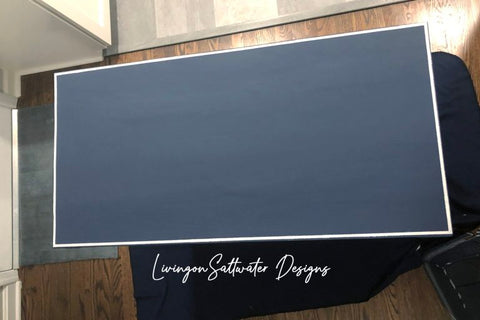
Here’s a picture of the dresser before and a list of my supplies with links (you can use any brand/color paint you want).

Supplies:
- BB Frösch Paint Transformer
- Zibra 2” Angle Brush (check out the BB Frösch/Zibra Limited Collaboration Bundle)
- Sand Paper
- Ruler
- Tack Cloth
- Wood Filler
- Cutting Edge Stencil Asha Bone Inlay
- Stencil Brushes (BB Frösch wax brushes are also excellent for stenciling!)
- Blue Painter's Tape
- Repositional Spray Adhesive
- Sherwin Williams in flatte Naval
- Sherwin Williams in latte White
- Sherwin Williams Extreme Bond Primer
- Water Based Poly in Satin
I filled in any scratches/holes with the wood filler and I sanded the dresser with 80 and 150 grit paper to take some of the original finish off and wiped the dust off with a tack cloth.
I put 2 coats of primer on the dresser with my 2” Zibra Angle brush and sanded with 220 grit paper.
Note: Adding BB Frösch to your paint makes priming unnecessary due to the excellent bonding properties it provides. However, you can certainly prime as Caroline did and it won't adversely affect your paint.

Then I mixed up some BB Frösch Paint Transformer in my Navy paint. BB Frösch powder gives any latex paint “chalk paint” properties. The powder helps with adhesion to the furniture surface and creates a buttery smooth finish. It makes the paint extra durable. I love that I can pick any brand or color of paint for a project. I mixed up 8 oz of paint with 2 tablespoons of powder and 2 tablespoons of water for this dresser. I was able to paint 3 coats with just 8 oz of paint!

After the dresser was painted Navy, I started on the stencil part. I used BB Frösch Paint Transformer to mix into my white paint to help with the adhesion of the stencil design.
I know this dresser and design can look daunting and very intimidating. Where do you start!? Should I plan everything out? How to do know what will fit where? These are the questions I asked myself a lot as I was leading up to this dresser. I found that after looking at a lot of inspiration pictures I knew I wanted to outline each of the drawers with a solid white line and I wanted to do the same for the top of the dresser. This is something simple and easy and helped me get a feel for how to stencil. I also practiced on a scrap piece of wood. I would encourage you to start with something simple and easy. This will help build your confidence.

To start with your first stencil, spray some of the spray adhesive on the backside of the stencil and let it sit there for a bit before using. This will help it tack up and dry a little bit before using it. You only need it to be a little sticky to prevent bleed through, but not sticky enough to pull up paint. When you’re ready to stencil, place the stencil on the dresser and use a ruler to check to make sure it is lined up correctly. Lightly press on the stencil to prevent bleed through. Then take your stencil brush and lightly cover the end in paint and wipe any excess off. It is easier to go over the stencil twice than have too much paint and have it bleed through the stencil. Lightly tap the brush on the exposed parts of the dresser until the design is covered.
You may wonder did I have this dresser all planned out? Nope, I didn’t. I “wing’d” this thing from start to finish. I did dry fit some of the stencils on different pieces to play with spacing. I used a ruler to help measure to make sure various stencils were lined up straight, but I truly didn’t have a plan going into this thing and made it up as I went along. After outlining each of the drawers and the top, I started on with the other stencils on the drawer. I knew I wanted to line up the flowers with the holes for the drawer pulls. None of the stencil designs were small enough where I could use the full stencil without going over the edge of the drawer, so I had to hide some of the stencil with painter’s tape.

The top drawer was a different size from the other 2 drawers (the bottom 2 drawers were the same size) and I decided to create a different design for the top drawer and made the bottom 2 drawers the same. On each drawer I started with the part of the stencil over the hole for the hardware and filled in the rest based on what would fit.

After the Drawers and top were done, I worked on the sides. This was the trickiest part on this dresser. The sides are not flush with the legs. There are panels that are slightly inset, which made it a little bit more time consuming for the stencil placement. I used a lot of blue tape to mark off different parts of the stencil that did not fit in the space that I was trying to cover.
After all of the stenciling was done, I went back and did some touch up with the navy pain where there were white spots or some areas I wanted to clean up. I used a small artist brush for the touch ups. After all of the painting was done, I put several coats of water-based poly on the dresser to seal everything up.
I am so happy how this dresser turned out. It is one of the top three things I’ve created! I hope this tutorial helps you and gives you the confidence to tackle a makeover like this.


Check out our Limited Edition Collaboration Bundle. This bundle is perfect for projects like this one.
